12 KiB
Executable file
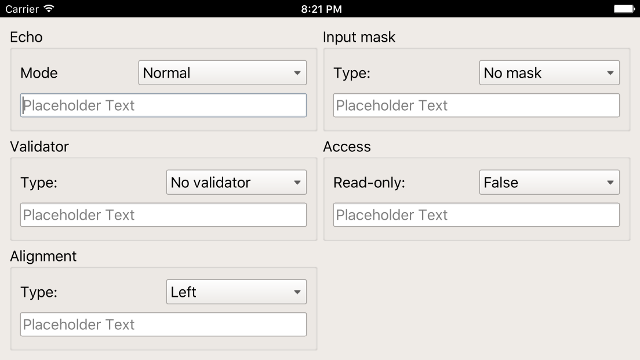
Screenshots
Windows

macOS

Linux

Android
Portrait

Landscape

iOS
Portrait

Landscape
Sailfish OS

Installation
-
Desktop
-
Mobile
-
Embedded
Windows
-
Install Go >= 1.7.1 and setup a proper GOPATH
-
Install Qt 5.7.0 in
C:\Qt\Qt5.7.0\ -
Add the directory that contains gcc.exe and g++.exe to your PATH
C:\Qt\Qt5.7.0\Tools\mingw530_32\bin\
-
Download the binding
go get -d github.com/therecipe/qt
-
Generate, install and test
cd %GOPATH%\src\github.com\therecipe\qt && setup.bat(run as admin)
-
Create your first application
macOS
-
Install Go >= 1.7.1 and setup a proper GOPATH
-
Prepare the go directory
sudo chown -R $USER /usr/local/go/
-
Prepare the Qt installation directory
QT_INSTALL_DIR=/usr/local/Qt5.7.0/; sudo mkdir $QT_INSTALL_DIR && sudo chown $USER $QT_INSTALL_DIR
-
Install Qt 5.7.0 in
/usr/local/Qt5.7.0/ -
Install Xcode >= 7.3.1
-
Download the binding
go get -d github.com/therecipe/qt
-
Generate, install and test
cd $GOPATH/src/github.com/therecipe/qt && ./setup.sh
-
Create your first application
Linux
-
Install Go >= 1.7.1 and setup a proper GOPATH
-
Prepare the go directory
sudo chown -R $USER /usr/local/go/
-
Prepare the Qt installation directory
QT_INSTALL_DIR=/usr/local/Qt5.7.0/; sudo mkdir $QT_INSTALL_DIR && sudo chown $USER $QT_INSTALL_DIR
-
Install Qt 5.7.0 in
/usr/local/Qt5.7.0/ -
Install g++ and OpenGL dependencies
sudo apt-get -y install build-essential mesa-common-dev
-
Download the binding
go get -d github.com/therecipe/qt
-
Generate, install and test
cd $GOPATH/src/github.com/therecipe/qt && ./setup.sh
-
Create your first application
Android
-
Install the desktop version
-
Install the Android SDK in
C:\android\android-sdk\or/opt/android-sdk/ -
Install the SDK dependencies with
C:\android\android-sdk\tools\android.bator/opt/android-sdk/tools/android- Tools
- Android SDK Build-tools (24.0.2)
- Android 7.0 (API 24)
- SDK Platform
- Extras (Windows only)
- Google USB Driver
- Tools
-
Install the Android NDK in
C:\android\android-ndk\or/opt/android-ndk/ -
Install Java SE Development Kit (Linux: install in
/opt/jdk/) -
Install and test
-
cd %GOPATH%\src\github.com\therecipe\qt && setup.bat android(run as admin)or
-
cd $GOPATH/src/github.com/therecipe/qt && ./setup.sh android
-
-
Create your first application
iOS
-
Install the desktop version for macOS
-
Install and test
cd $GOPATH/src/github.com/therecipe/qt && ./setup.sh ios && ./setup.sh ios-simulator
-
Create your first application
Sailfish OS
-
Install the desktop version
-
Install VirtualBox
-
Install the Sailfish OS SDK in
C:\SailfishOS\or/opt/SailfishOS/ -
Install and test
-
cd %GOPATH%\src\github.com\therecipe\qt && setup.bat sailfish && setup.bat sailfish-emulator(run as admin)or
-
cd $GOPATH/src/github.com/therecipe/qt && ./setup.sh sailfish && ./setup.sh sailfish-emulator
-
-
Create your first application
Raspberry Pi
-
Install the desktop version for Linux
-
Create a folder
[HOME]/raspimkdir ~/raspi
-
Download and unpack the Qt 5.7.0 source
cd ~/raspi && wget https://download.qt.io/official_releases/qt/5.7/5.7.0/single/qt-everywhere-opensource-src-5.7.0.tar.gztar -xzf qt-everywhere-opensource-src-5.7.0.tar.gz qt-everywhere-opensource-src-5.7.0
-
Download the cross compiler
cd ~/raspi && git clone https://github.com/raspberrypi/tools.git
-
Install Arch Linux on your SD card
-
sudo apt-get -y install bsdtar -
Raspberry Pi 1
-
Raspberry Pi 2
-
Raspberry Pi 3
-
-
Start your Raspberry Pi
-
Enable root login over ssh
-
export RASPI_IP=192.168.XXX.XXX(replace XXX.XXX with the valid ip ending) -
ssh alarm@$RASPI_IP(password: alarm) -
su(password: root) -
sed -i 's/#PermitRootLogin/PermitRootLogin/' /etc/ssh/sshd_config && sed -i 's/prohibit-password/yes/' /etc/ssh/sshd_config && systemctl restart sshd.service
-
-
Update and install dependencies
-
pacman -Syu -
pacman -S fontconfig icu libinput libjpeg-turbo libproxy libsm libxi libxkbcommon-x11 libxrender tslib xcb-util-image xcb-util-keysyms xcb-util-wm freetds gtk3 libfbclient libmariadbclient mtdev postgresql-libs unixodbc assimp bluez-libs sdl2 jasper libmng libwebp gst-plugins-base-libs libpulse openal gst-plugins-bad hunspell libxcomposite wayland gst-plugins-base libxslt gst-plugins-good ffmpeg jsoncpp libevent libsrtp libvpx libxcursor libxrandr libxss libxtst nss opus protobuf snappy xcb-util xcb-util-cursor xcb-util-renderutil xcb-util-xrm libxfixes libxshmfence libxext libx11 libxcb libice weston ttf-freefont lxde gamin xorg-server xorg-xinit xorg-server-utils mesa xf86-video-fbdev xf86-video-vesa rsync -
pacman -Scc -
echo 'exec startlxde' >> ~/.xinitrc -
startx & exit
-
-
Get sysroot for cross compiling (password: root)
-
cd ~/raspi && mkdir sysroot sysroot/usr sysroot/opt -
rsync -avz root@$RASPI_IP:/lib sysroot --delete -
rsync -avz root@$RASPI_IP:/usr/include sysroot/usr --delete -
rsync -avz root@$RASPI_IP:/usr/lib sysroot/usr --delete -
rsync -avz root@$RASPI_IP:/opt/vc sysroot/opt --delete
-
-
Fix sysroot
cd ~/raspi && wget https://raw.githubusercontent.com/riscv/riscv-poky/master/scripts/sysroot-relativelinks.pychmod +x sysroot-relativelinks.py && ./sysroot-relativelinks.py sysroot
-
Build Qt
-
cd ~/raspi/qt-everywhere-opensource-src-5.7.0 -
Raspberry Pi 1
./configure -opengl es2 -device linux-rasp-pi-g++ -device-option CROSS_COMPILE=~/raspi/tools/arm-bcm2708/arm-rpi-4.9.3-linux-gnueabihf/bin/arm-linux-gnueabihf- -sysroot ~/raspi/sysroot -opensource -confirm-license -make libs -skip webengine -nomake tools -nomake examples -extprefix /usr/local/Qt5.7.0/5.7/rpi1 -I ~/raspi/sysroot/opt/vc/include -I ~/raspi/sysroot/opt/vc/include/interface/vcos -I ~/raspi/sysroot/opt/vc/include/interface/vcos/pthreads -I ~/raspi/sysroot/opt/vc/include/interface/vmcs_host/linux -silent
-
Raspberry Pi 2
./configure -opengl es2 -device linux-rasp-pi2-g++ -device-option CROSS_COMPILE=~/raspi/tools/arm-bcm2708/arm-rpi-4.9.3-linux-gnueabihf/bin/arm-linux-gnueabihf- -sysroot ~/raspi/sysroot -opensource -confirm-license -make libs -nomake tools -nomake examples -extprefix /usr/local/Qt5.7.0/5.7/rpi2 -I ~/raspi/sysroot/opt/vc/include -I ~/raspi/sysroot/opt/vc/include/interface/vcos -I ~/raspi/sysroot/opt/vc/include/interface/vcos/pthreads -I ~/raspi/sysroot/opt/vc/include/interface/vmcs_host/linux -silent
-
Raspberry Pi 3
./configure -opengl es2 -device linux-rpi3-g++ -device-option CROSS_COMPILE=~/raspi/tools/arm-bcm2708/arm-rpi-4.9.3-linux-gnueabihf/bin/arm-linux-gnueabihf- -sysroot ~/raspi/sysroot -opensource -confirm-license -make libs -nomake tools -nomake examples -extprefix /usr/local/Qt5.7.0/5.7/rpi3 -I ~/raspi/sysroot/opt/vc/include -I ~/raspi/sysroot/opt/vc/include/interface/vcos -I ~/raspi/sysroot/opt/vc/include/interface/vcos/pthreads -I ~/raspi/sysroot/opt/vc/include/interface/vmcs_host/linux -silent
-
make && sudo make install
-
-
Prepare the Qt directory
sudo chown -R $USER /usr/local/Qt5.7.0/
-
Install the binding
-
Raspberry Pi 1
cd $GOPATH/src/github.com/therecipe/qt && ./setup.sh rpi1
-
Raspberry Pi 2
cd $GOPATH/src/github.com/therecipe/qt && ./setup.sh rpi2
-
Raspberry Pi 3
cd $GOPATH/src/github.com/therecipe/qt && ./setup.sh rpi3
-
-
Notes
-
run
startx(if not already running) before starting an application with-platform xcb -
most examples in examples/quick won't work because they use
quick.NewQQuickView; usequick.NewQQuickWidgetorqml.NewQQmlApplicationEngineinstead -
you can increase the available gpu memory by editing
/boot/config.txt
-
-
Create your first application
Example
-
Create a project folder
[GOPATH]/src/qtExample -
Create a file
[GOPATH]/src/qtExample/main.go
package main
import ( "os"
	"github.com/therecipe/qt/core"
	"github.com/therecipe/qt/widgets"
)
func main() { widgets.NewQApplication(len(os.Args), os.Args)
	//create a button and connect the clicked signal
	var button = widgets.NewQPushButton2("Click me!", nil)
	button.ConnectClicked(func(flag bool) {
		widgets.QMessageBox_Information(nil, "OK", "You clicked me!", widgets.QMessageBox__Ok, widgets.QMessageBox__Ok)
	})

	//create a layout and add the button
	var layout = widgets.NewQVBoxLayout()
	layout.AddWidget(button, 0, core.Qt__AlignCenter)

	//create a window, add the layout and show the window
	var window = widgets.NewQMainWindow(nil, 0)
	window.SetWindowTitle("Hello World Example")
	window.SetMinimumSize2(200, 200)
	window.Layout().DestroyQObject()
	window.SetLayout(layout)
	window.Show()

	widgets.QApplication_Exec()
}
3. Open the { command-line | terminal | shell } in `[GOPATH]/src/qtExample` and run `qtdeploy build desktop`

4. You will find the application in `[GOPATH]/src/qtExample/deploy/[GOOS]/qtExample`

5. Take a look at the [examples](https://github.com/therecipe/qt/tree/master/internal/examples)

6. Make yourself familiar with the [qt documentation](https://doc.qt.io/qt-5/classes.html)